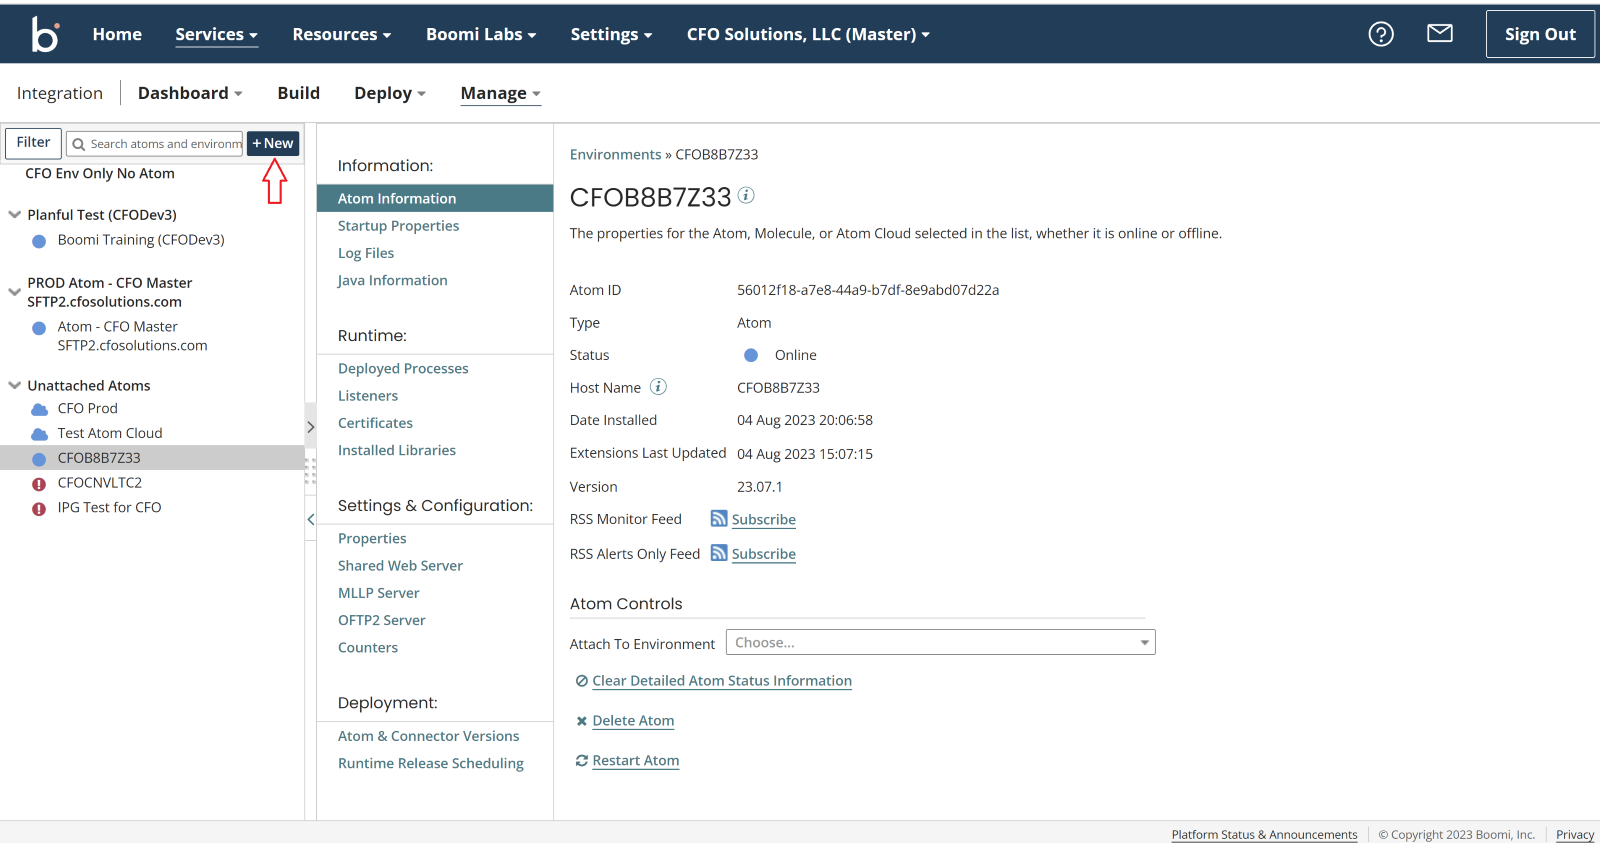
In Boomi, Atom Management, click “New” (1) to start installer download.
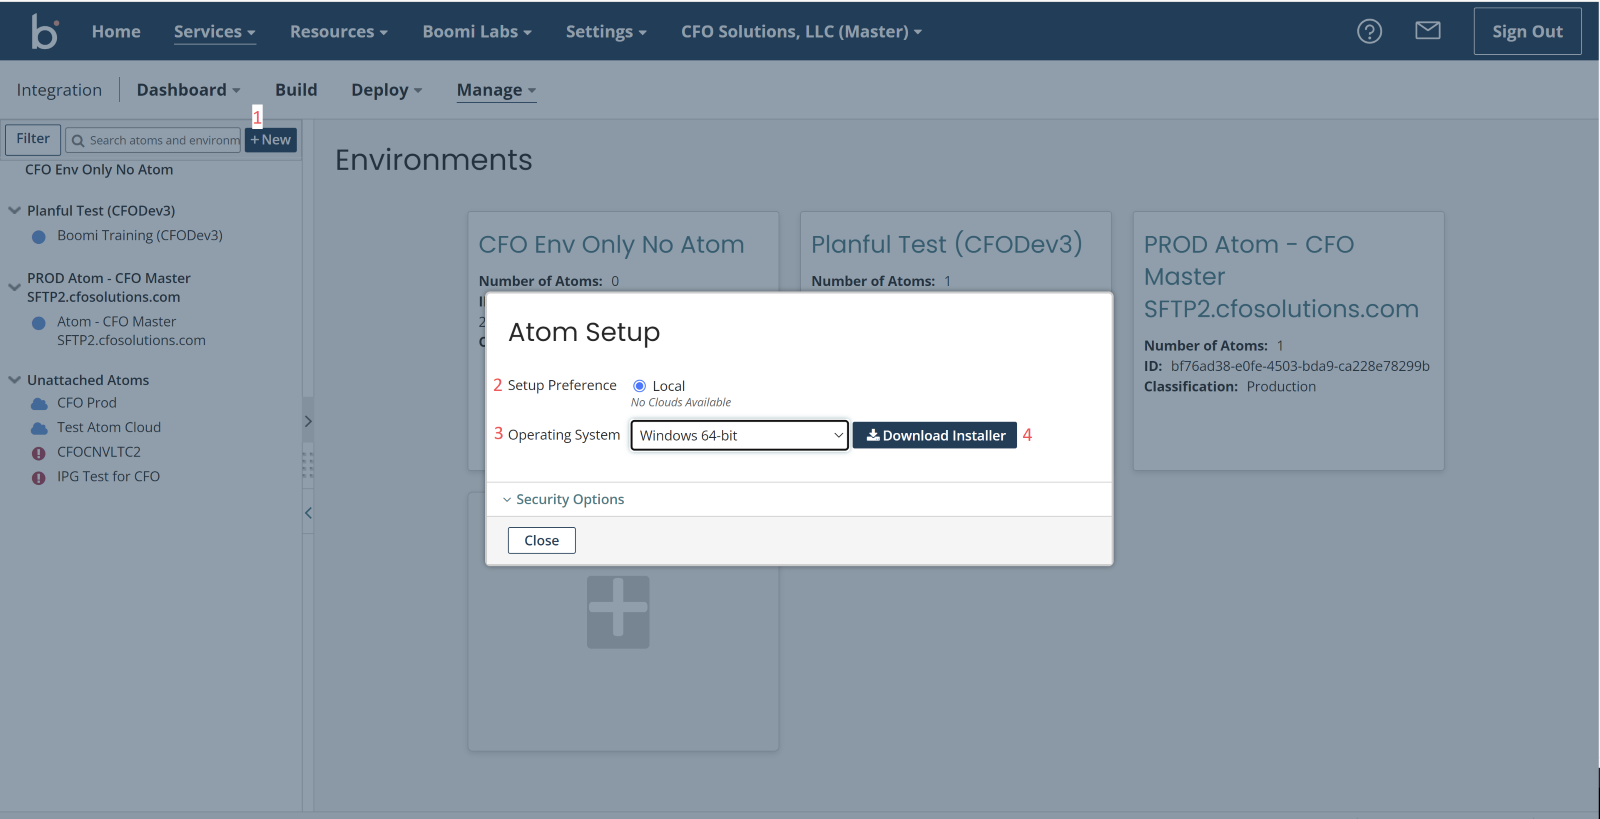
Select “Local” (2) and then select Operating System (3) and then select “Download Installer” (4).
Boomi install includes JRE download from Boomi as part of process or you can download from Oracle before the install, so it uses the one you installed. Oracle download:
http://www.oracle.com/technetwork/java/javase/downloads/jre8-downloads-2133155.html
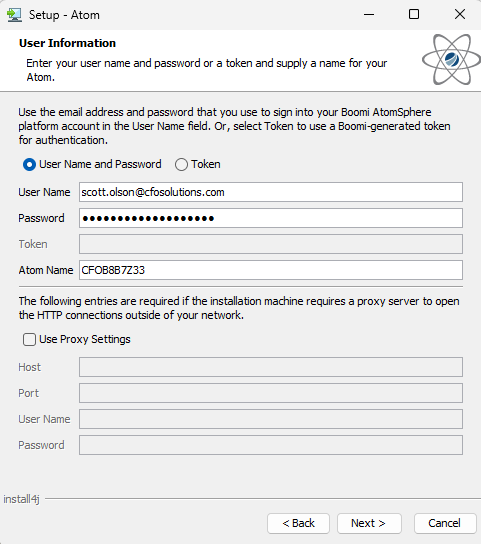
Right click on the installer download and select “Run as Administrator”. The first step in installer asks for login credentials and the name of the Atom to create. For CFO server installations, we use our login credentials. For client installations, the client uses their credentials. The Atom name defaults to the hostname of the Atom server – I usually recommend that the client should name it something that tells them where the Atom is located, so they often leave the name as is. Leave “Use Proxy Settings” unchecked.
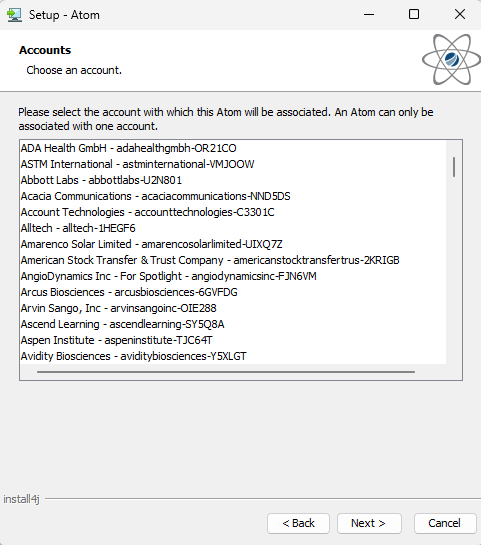
Next step asks to associate Atom with a Boomi account. This screen will not show for logins that have only one account associated with it.
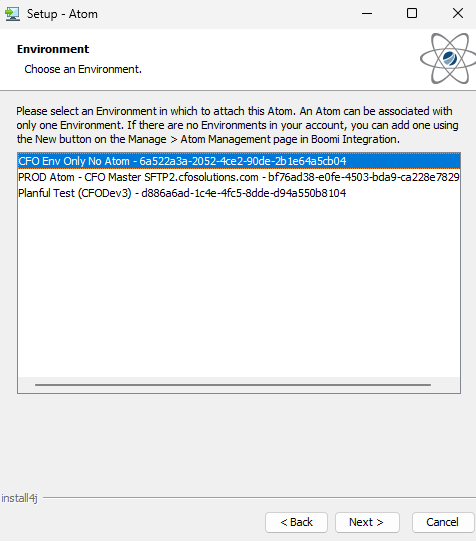
Next step asks for the environment to which you’d like to attach the Atom – this will not show (or will show up blank) if no environments have been created. You do not have to do this now.
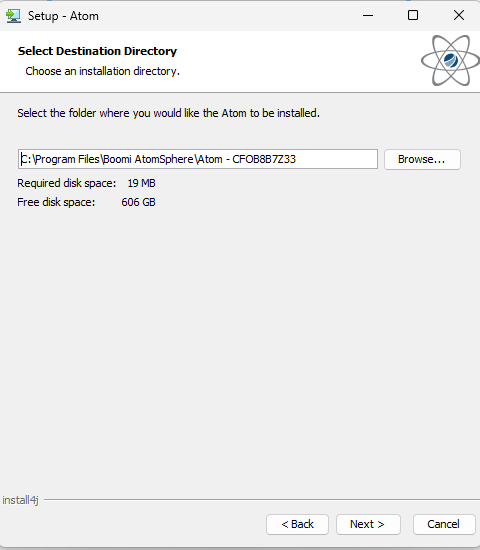
Next step asks for path of where to install Atom. For CFO servers, we just change the drive letter to E:.
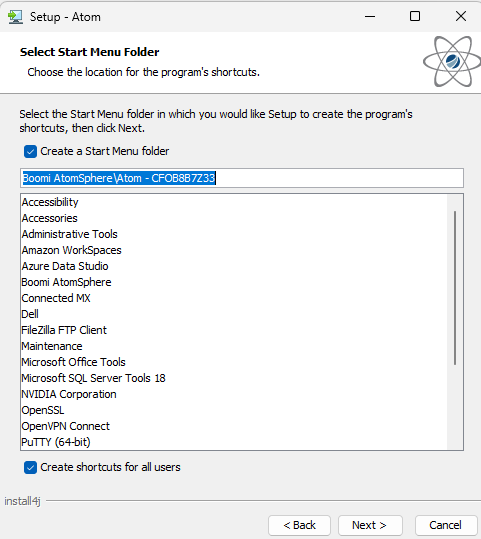
Next page asks about Start Menu folder and shortcuts – accept defaults (checked).
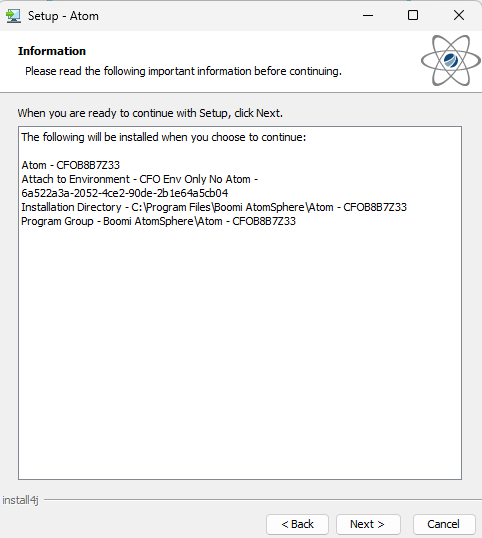
The next page is a summary of the installation information. This is your last chance to pick “Back”.
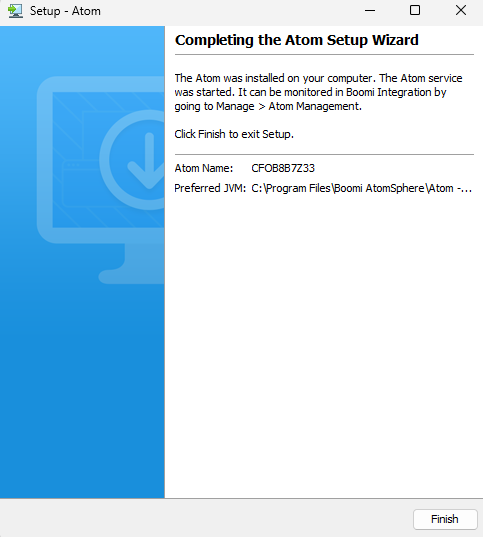
If everything installed OK, you would get a confirmation screen. Note in this case, since we installed a local JRE before the installer kicked off, it shows “Preferred JVM” as the one installed (instead of Atom installer getting one from Boomi).
On the web, sign into the client’s Boomi account. Under Manage, Atom Management, click “New”
A window pops up to specify the environment name. Clients rarely purchase Test licenses so there will only be one environment. Name it for the client and specify Prod e.g., ICP-Prod. If they decide later to purchase test licenses, then that environment would be named –Dev or -Test or –Stage or whatever is appropriate.

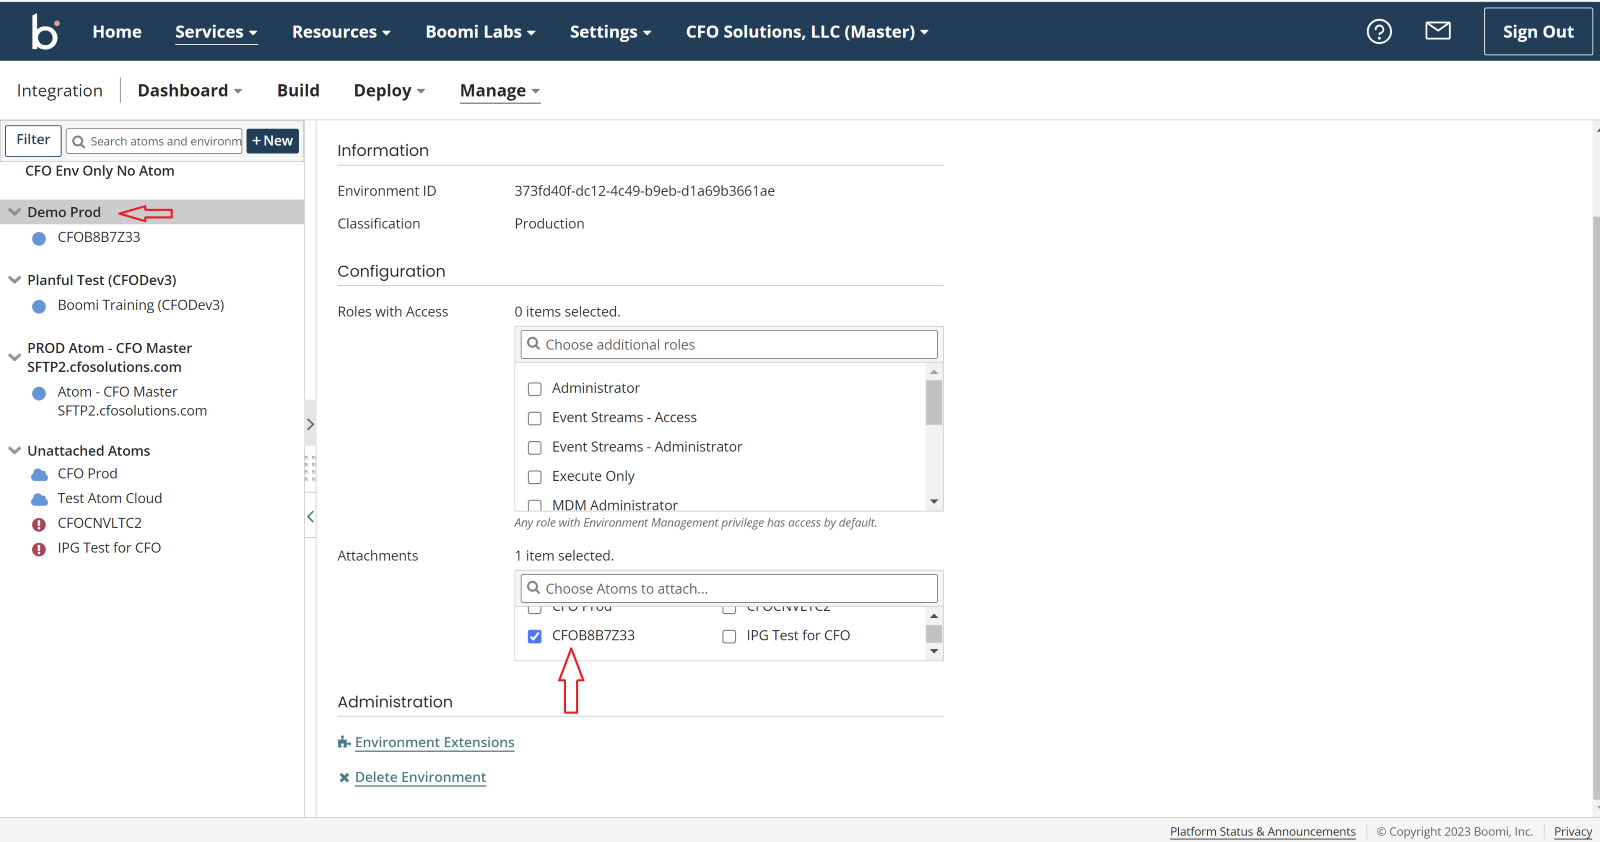
Now, select the Environment you just created and then select the Atom you’d like to attach to it.